poultrykeeper logo

Incubation Troubleshooting Guide

Incubation Troubleshooting Guide

When things don’t go quite according to plan (which can and does happen when incubating poultry artificially), try using this incubation troubleshooting guide to work out what went wrong. If you can find the problem, you’re already halfway to fixing it!

This guide is a general guide and covers all poultry, although I use chicks/chickens as an example.

Incubation requires the right temperature, humidity, ventilation to provide fresh air to the eggs and egg-turning to stop embryos from sticking to the shells.

The following articles might help you in conjunction with this troubleshooting guide:

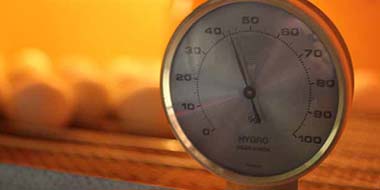
  • Incubation humidity – A lot of problems are caused by the humidity being too high. This in-depth guide shows you how to measure the relative humidity in your incubator accurately.
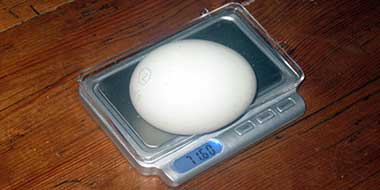
  • Weight loss method of incubation – If you have eggs that are difficult to hatch or struggle with the correct humidity, the weight loss method is far more accurate.
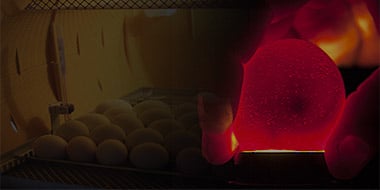
  • Candling eggs – Candling is an essential process during incubation. This guide helps you learn what to look for when you’re working out what went wrong.

Inspecting your eggs

Air sac size and contents of the egg

Although it can be a smelly job, it is advisable to crack open eggs to get a better look, but before you do, check the size of the air sac.

Air Sac Development

The air sac’s size is an excellent indication of how much weight the egg has lost during incubation. It can tell you whether the humidity has been too high or too low. The image shows you the expected size of the air sac at different incubation times.

If the humidity is too high, there isn’t enough moisture lost from the egg, and the air sac is too small. Conversely, if the humidity is too low, there is too much weight loss, and the air sac is too large.

Once you know how big the air sac was and have carefully opened the shell, use the incubation troubleshooting guide to see whether you can get some ideas of what went wrong.

Incubation troubleshooting guide

ProblemPossible Cause(s)Remedies
Eggs clear. No growth or blood in egg or small growth/blood when opened.Male sterile or not mating.
  • Check the age of the male. He shouldn’t be too young or too old.
  • Be selective, select for high hatchability.
  • Ensure the season is right (spring) and you see mating.
Unsuccessful mating
  • Check feathers around the vent area are not too thick on both cockerel and hen. Some breeds like Orpingtons can be trimmed to get success.
  • Use Artificial Insemination (AI)
  • Check whether your cockerel is up to the job physically.
Poor nutrition or inadequate water.
  • Feed birds specialist breeder pellets and provide fresh greens / free-range. Add vitamins to freshwater (as directed on the bottle or packet) and ensure an adequate water supply.
Birds overcrowded.
  • Allow more space.
Eggs stored for too long or stored at the incorrect temperature.
  • Store eggs in a cool place. Set eggs ideally within a week as fertility falls off gradually.
  • For longer storage, store eggs at the correct temperature and humidity and turn them 3 times daily.
  • See How to Collect and Store Hatching Eggs
Eggs are shaken or dropped – such as going through the postal system.
  • Try to collect eggs in person, or try another batch of eggs or different delivery service.
  • See How to Sell Hatching Eggs for tips on selling (and buying) hatching eggs and how to ship them successfully.
The temperature of the incubator is too high or low
  • Check incubator settings. Check thermometers are correct. Maintain correct temperature.
Hereditary poor hatchability.
  • Select a strain with good hatchability.
Flock in poor condition / incorrect feeding.
  • Feed birds specialist breeder pellets and provide fresh greens / free-range. Add vitamins to fresh water (as directed on the bottle or packet) and ensure an adequate water supply.
Eggs chilled or overheated before collection.
Chicks died before fully developingVentilation inadequate.
  • Provide sufficient ventilation according to incubator manufacturer’s instructions.
The temperature of the incubator is too high or low.
  • Check incubator settings. Check thermometers are correct. Maintain correct temperature.
  • See Setting up an incubator – How to set up your incubator for success.
Incorrect or inadequate turning.
  • Ensure eggs are turned automatically or turn manually 3 times a day minimum.
Dead in Shell Gosling
This duckling was 'dead in shell' with an unabsorbed yolk sac.
Chicks fully formed but dead in shell, no pipping. On opening eggs, sometimes unabsorbed yolk can be seen.Disease or flock in poor condition.
  • Treat disease and improve flock condition.
 Eggs chilled or overheated before collection.
 Low average humidity over the incubation cycle.
  • Check hygrometer accuracy. Maintain correct humidity in the incubator throughout the incubation and hatching cycle.
 The temperature of the incubator is too high or low.
  • Check incubator settings. Check thermometers are correct. Maintain correct temperature.
 Incorrect or inadequate turning.
  • Ensure eggs are turned automatically or turn manually 3 times a day minimum.
Dead in Shell Duckling
This duckling was 'dead in shell', fully formed but couldn't move into the hatching position because it was so big. The air sac is also tiny, indicating the humidity was too high.
Chicks fully formed but dead in shell, chicks breakthrough air sac and sometimes pip the shell but don’t make it out.

High average humidity over the incubation cycle.

Eggs haven’t lost enough weight, the air sac is too small, and the chicks are too large for the available space.

Chick unable to move into the hatching position, or, if it does, the membrane is too rubbery to breakthrough.

If it breaks through to the air sac, it will not have enough oxygen and suffocate.

Chicks that hatch will be larger than average.

  • Check hygrometer accuracy.
  • Maintain correct humidity in the incubator throughout the incubation and hatching cycle.
 Low average temperature.
  • Check incubator settings. Check thermometers are correct. Maintain correct temperature.
 Ventilation inadequate.
  • Provide sufficient ventilation according to incubator manufacturer’s instructions.
 Temperature too high for a short period of time.
  • Check incubator settings. Check thermometers are correct. Maintain correct temperature.

Related Posts:

Breeding Quail
Keeping Quail
Breeding Quail

Quail are becoming more popular to keep for their delicious eggs but if you would like to increase your stock

Read More »
How to help a chick hatch
Incubating, Hatching & Brooding Chicks
How to Help a Chick Hatch

In this guide, Gail Damerow will help us to understand why a chick can’t always make it out on its own, why it’s not usually a good idea to intervene, and if you do decide to assist, how to help a chick hatch.

Read More »
How to Help a Chick Hatch

In this guide, Gail Damerow will help us to understand why a chick can’t always make it out on its own, why it’s not usually a good idea to intervene, and if you do decide to assist, how to help a chick hatch.

Read More »

On this page:

You might also enjoy:

Incubation Humidity
Incubating, Hatching & Brooding Chicks
Incubation Humidity

What is the correct incubation humidity for hatching eggs, and how do we measure it? How to get the right humidity for chicken, duck, goose & quail eggs.

Read More »
Setting Up Incubator
Incubating, Hatching & Brooding Chicks
Setting Up Your Incubator

Success using an incubator isn’t guaranteed, especially with some of the cheaper models available. Getting good results at hatch time

Read More »
How to help a chick hatch
Incubating, Hatching & Brooding Chicks
How to Help a Chick Hatch

In this guide, Gail Damerow will help us to understand why a chick can’t always make it out on its own, why it’s not usually a good idea to intervene, and if you do decide to assist, how to help a chick hatch.

Read More »
Candling Eggs
Incubating, Hatching & Brooding Chicks
Candling Eggs

What will you see candling eggs? Pictures and videos of candling chicken eggs at 7 & 14 days of incubation and a useful air sac development chart.

Read More »