We often take great care of incubation, trying to get as many chicks to hatch as possible, but how much attention do we give to getting the most viable eggs beforehand?
This article will tell you how to collect and store hatching eggs correctly before incubation using an incubator or broody hen.
Before we reach the time to collect and store hatching eggs, ready for incubation, there is some preparatory work we need to do in the months running up to the breeding season.
Healthy parent stock
Healthy birds produce viable eggs—fertility and hatchability decline when hens become ill. Even poultry worms, for example, will cause problems with the number of viable eggs you can collect from your birds.
If you feed your birds a good diet, they will lay more fertile, viable eggs. Feeds with Omega 3 and 6 fatty acids will support high-quality sperm and eggs, while protein provides essential amino acids and methionine, which helps proper egg development and aids hatchability.
Ideally, feed a specialised breeders ration for at least a couple of months before you intend to collect eggs for hatching.
Allowing birds to free-range with access to grass will also improve their health no end, but it isn’t a substitute for a balanced feed.
Finally, birds need access to insoluble poultry grit to digest their food correctly, which should always be available to them ad-lib.
Vigour of a strain
The vigour and hatchability declines as birds become more closely related. Close breeding is common with show birds; however, it’s also common not to outcross too often, or you will soon lose particular looks and characteristics from your birds (quite quickly, in fact, in just two or three generations).
I started my flock of Cream Legbars from a trio of birds, and after eight years, both fertility and hatchability were low (less than 50%), so I outcrossed, introducing a new bloodline. The fertility immediately increased to over 90%, and the vigour of the chicks I was hatching made me realise how bad my hatchability had been.
Hygiene
Nest boxes should be as clean as possible so that eggs get the least amount of soiling possible. For chickens, the main problem seems to be when hens sleep in nest boxes, messing in them overnight.
There are ways to overcome this: blocking off the nest boxes at dusk (a cardboard box the right size will do) to making nests darker, which encourages laying in the nestbox rather than elsewhere. I have found the most straightforward technique is nailing an old feed bag over the entrance, with a few strips cut in it.
Hens may be using nestboxes if there isn’t enough perch space for them, or in some cases, if they are positioned higher than perches, I recommend you look out for this when researching chicken houses.
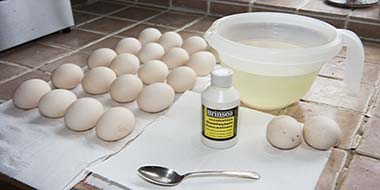
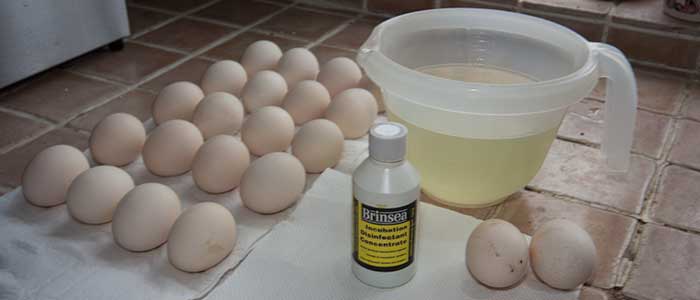
It’s better not to have dirty eggs in the first place, but if you find you have some eggs that need cleaning, you can wash them with a little warm water mixed with a suitable egg sanitiser.
Still, heavily soiled eggs are better off left out of the incubator unless they are high value or in short supply.
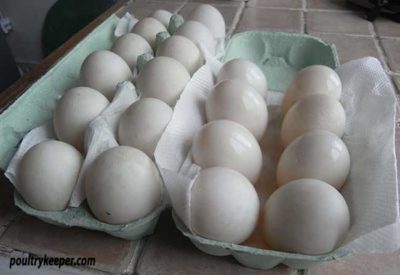
Keeping eggs clean with waterfowl can be difficult, but if their nesting areas are kept clean, there is no reason why their eggs shouldn’t be reasonably clean when you collect them.
Incubation
Disinfectant
Bacteria multiply very quickly at incubation temperatures.
I use a biodegradable Incubation Sanitiser in tepid water to clean hatching eggs that are mucky.
This is effective against viruses, yeasts, fungi, and bacteria which can damage the developing embryo.
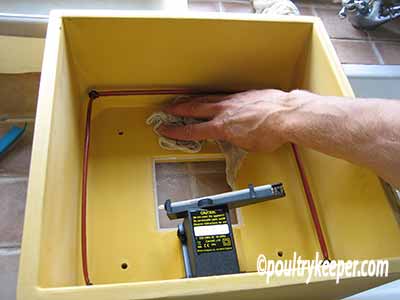
A sanitiser is also useful for safely cleaning out your incubator after use.
How to collect hatching eggs
Eggs should be collected regularly – at least three times per day. If the weather is hot, this needs to be as soon as possible after laying. Broody hens should not be allowed and are better removed from the run to sit on dummy eggs until you are ready or taken out and ‘broken’ from their broodiness.
Any small increase in temperature can start incubation which will be a problem for storing them for any reasonable time.
Shape and size
Although it’s tempting to incubate the largest eggs your hens lay, average size eggs are more likely to hatch. Only collect eggs that are the correct shape. Eggs that are too round or pointed do not provide the right environment for the embryo to develop.
How to store hatching eggs
Storing hatching eggs is a natural part of the incubation process. A hen will select a suitable site for a nest and gradually build up a clutch of eggs before incubating them.
We can similarly store hatching eggs, finding a suitable location at home where it’s not too warm and gather enough eggs to incubate.
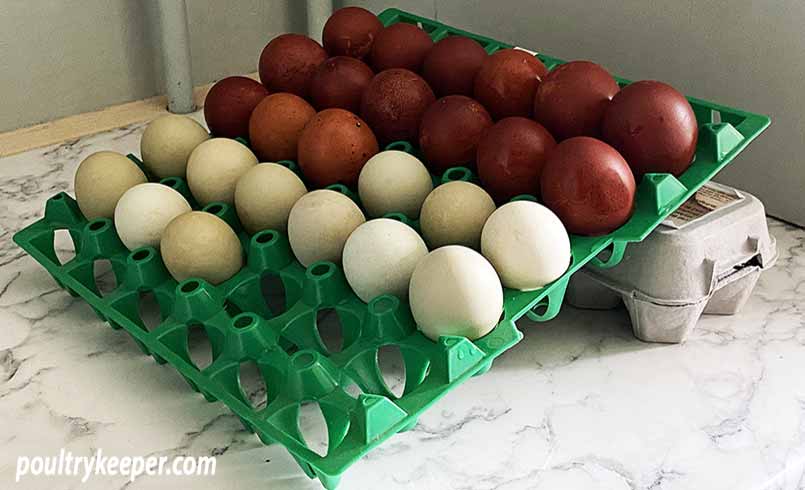
Store eggs pointed end down to keep the yolks centred within the albumen. Use clean egg trays or in egg boxes in a cool, dark room or cupboard. Try to avoid places that have temperature fluctuation or sunlight coming in through a window.
If eggs need cleaning, then use an incubation disinfectant/sanitiser diluted with tepid water at the correct rate.
- For storage up to 7 days, 15 to 18°C and 75% humidity is recommended.
- For storage longer than 7 days, 10 to 12°C and 85% humidity is recommended.
Egg turning
Just like we turn eggs in the incubator, we need to turn eggs that are stored for longer than a couple of days to stop the yolks from sticking to one side of the shell.
It is easier than it sounds. Tilt your eggs 45 degrees by elevating one end of the egg box or tray. Elevate the opposite end the next day.
How long can hatching eggs be stored?
You can store hatching eggs for up to two, even three weeks without any noticeable deterioration in the hatch rate under the right conditions.
Getting the right storage conditions (10-12°C) for this length of time without purchasing specialist equipment is usually the problem for a back garden poultry keeper (see my solution with a DIY egg fridge below).
Keeping hatching eggs for up to a week at 15-18°C is more manageable, so this tends to be a rule of thumb for a backyard flock. A humidity of 75% can be challenging in dry climates. Adding trays of water to the storage cupboard or room can increase the moisture content of the air.
DIY egg fridge for hatching eggs
Most of us don’t want to pay for a temperature-controlled environmental unit to store hatching eggs for an extended period.
Even set to the warmest setting, a fridge usually gives temperatures of around 5°C, which is too cold for storing hatching eggs.
I came up with one solution to fit egg trays into an old fridge, then use a thermostatically controlled relay socket to turn it on and off to maintain the correct temperature range.
The Inkbird ITC-308 Digital Thermostat plugs into the mains, and the temperature probe is placed in the fridge near the eggs.
It has two sockets—one to control heating and the other, cooling. Providing the outside air temperature is above the desired temperature range, there is no need to use a heater.
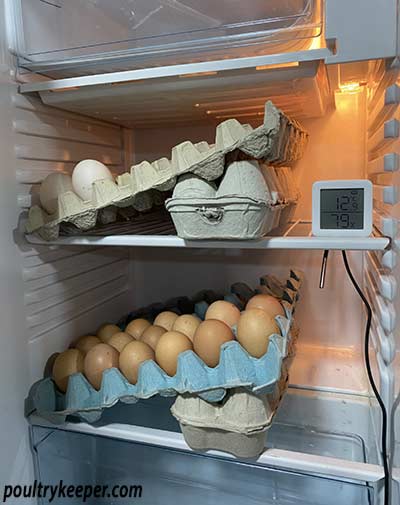
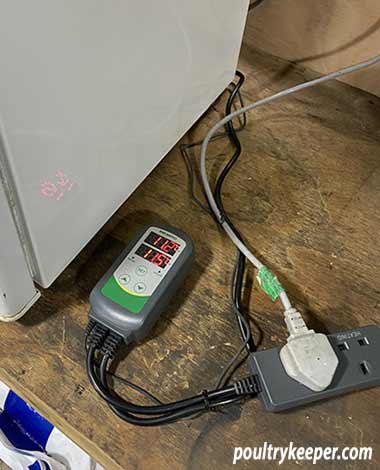
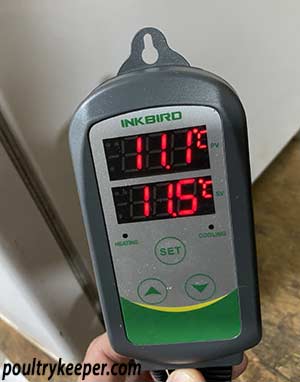
Plug the fridge into the cooling socket and set the desired temperature. There is a setting for when the cooling turns back on again, so it isn’t constantly switching the fridge’s compressor on and off.
To increase humidity, you can add a tray of water that will slowly evaporate, increasing the air’s humidity. I place containers in the fridge door.
Incubation day
When you are ready to incubate, if your hatching eggs are stored at a cool temperature, they will gradually come up to room temperature if you give them sufficient time.
There is more information in this article if you are hatching eggs under a broody hen.
If you are hatching artificially, your incubator needs to be running at least 24 hours beforehand.
Often, the incubator humidity is where there are the most problems. I covered measuring and checking relative humidity in incubators in this guide extensively.
Good luck with your incubation. I hope you now know how to collect and store hatching eggs to get the best results from your hatch.


