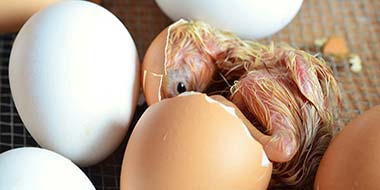
Success using an incubator isn’t guaranteed, especially with some of the cheaper models available. Getting good results at hatch time won’t just depend on your incubator’s performance; the way you set it up and check your measurements are important too.
This article aims to help you set up your incubator to get the best possible results.
Egg incubators come in many shapes and sizes. The controls can vary between different models, so I suggest you read the manufacturer’s instructions to get familiar with your particular model’s operation before you start.
However automated your incubator is, assuming you have viable eggs, incubation boils down to four things that need setting up to hatch eggs successfully:
- Incubation temperature
- Incubation humidity
- Ventillation into/out of the incubator
- Turning the eggs regularly
There are two basic incubators: still-air and forced-air (contains a fan), although almost all incubators on the market these days are forced air types.
I have included some information on still air incubators in the drop-down box below if your incubator is a still-air type.
Still-air incubators have a heating element at the top, and thermal stratification occurs inside the incubator. In other words, there are layers of air with a temperature gradient between the heater element and the base of the incubator.
The science behind this is that cooler, denser air sinks, and warmer, thinner air rises, creating this gradient of air temperatures.
Sometimes you will notice this happening in buildings with high ceilings, and you may also see heating systems blow hot air out of vents downwards into a room to overcome this stratification.
Still-air incubators provide the correct incubation temperature where the embryo sits (the centre of the egg).
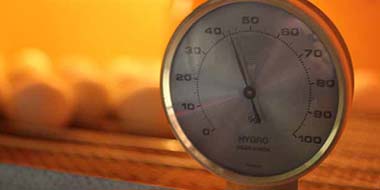
We need to be careful where we take readings of temperature and humidity.
 My ‘Brinsea Hatchmaker‘ incubator recommends 39.2° at the TOP of the eggs for hens eggs – this should be the correct incubation temperature (in this case, 37.5°) at the centre of the egg.
The height of the thermometer can be adjusted and read through the window at the top.
Measuring humidity is also a challenge in still-air incubators because it is relative to the temperature, so your wet and dry bulb readings (or another hygrometer) must be sitting at the same height as the embryos.
Finally, another problem is the stratification changes the moment you remove the lid, and you’ll end up taking incorrect readings!
The best solution I have found is to use an electronic thermometer/hygrometer with an external sensor, or wireless Switchbot wireless sensor, taking measurements at the same height as the eggs’ centre.
Operating your incubator
Location, settling time and initial checks
Locate your incubator in a room or insulated building outside where the temperature is reasonably constant. Most incubators suggest room temperature between 18 and 22°C, although some are quite specific and will not perform well outside of this range, especially in colder climates.
Incubators are not particularly well insulated, so avoid fluctuations in operating temperature. Do not put your incubator near a radiator or window where the sun can shine in and avoid drafty areas or where there is air conditioning blowing.
Fluctuations in temperature are the most common cause of problems. You can use a cheap electronic temperature meter that records maximum and minimum temperatures to check your incubator location. Some garden sheds can easily swing between 5 and 25°C in 24 hours, which is not suitable for most incubators.
The air in the room shouldn’t be too dry. Central heating or air conditioning can dry the air, or you may live in an arid region of the world. If so, you can increase the humidity by having trays of water in the room, provided there is not too much ventilation to change the air. A typical operating humidity for incubators is between 40 and 70% relative humidity.
Vibrations from fans within the incubator or other equipment nearby can cause problems with embryo development, so locate your incubator on a solid surface.
Ready to incubate?
When you are ready to incubate some eggs, power-up your incubator and allow it to run for several hours, all incubators need time to heat up and settle. If the ventilation is adjustable, set it according to the recommendation in the instructions. If you don’t have these, then set the vents half-way.
Water will often need to be added to the reservoir to provide sufficient humidity. Again, follow the incubator manufacturer’s guide.
Most manual humidity incubators have a tray or container that needs filling and an additional area for the extra humidity required during the hatch.
In some incubators, you can control the humidity further by adjusting ventilation controls. Since the humidity varies with the weather, you may need to make adjustments from day-to-day.
On higher priced incubators, you can get automatic humidity control. These will often have a reservoir and a pump that pumps water into the incubator to evaporate.
It is best to make final adjustments to humidity when your incubator is full of eggs since they will be losing moisture and contributing to the relative humidity.
Water for incubators: A stitch in time...
Your incubator will need water to produce the right humidity. It can be 5 to 10 litres over a typical incubation period. When using tap (or bottled) water, you will find calcium and mineral deposits building up inside the incubator.
I would recommend using de-ionised water in your incubator, which has the impurities removed, especially in areas that have hard water because this will save servicing and de-scaling the incubator later on.
Once your incubator has stabilised, you will need to check the temperature and humidity.
Measuring the temperature and humidity
During incubation, it is a good idea to keep records of temperature and humidity. I monitor the room temperature and humidity with a relatively cheap digital thermometer/hygrometer and the temperature and humidity inside my incubator using a SwitchBot wireless sensor which costs about £25.
Whilst the display resolution on many digital thermometers is good (usually 0.1°C), the accuracy is often only ±5% on cheap units. Check the accuracy before you buy because 5% in 37 degrees is a potential error of nearly ±2 degrees!
I like the SwitchBot sensor because it provides a graph of temperature and humidity, effectively providing continuous logging that I can view on my phone.
Whilst we must keep the temperature very stable during incubation, the humidity often varies from day-to-day. It is the average humidity over the incubation period that is important.
The Switchbot sensor shows the average, and I can make adjustments if the average humidity is too high or low.
If the hatch goes wrong, having records allows you to figure out what went wrong. I have written a troubleshooting guide that can help to pinpoint incubation problems.

When operating an incubator for the first time, I check the incubator’s readings against my ‘known good’ thermometer and hygrometer. The cheapest and most accurate method I have found is using a wet and dry bulb reading.
My guide on incubation humidity goes into detail and shows my DIY wet and dry bulb hygrometer.
Most digital incubator displays can be adjusted or calibrated to read the correct temperature and humidity. New incubators coming from the factory should already be calibrated and shouldn’t need adjustments.
Temperature variations
Unless you pay a lot of money for an incubator, there are often temperature variations across an incubator and between eggs. Temperature variation causes a hatch to take longer, but also, your temperature measurements will vary in different places inside the incubator.

I suggest you measure at the same height as the eggs’ centre and measure in a few locations where your eggs will sit. If there is a lot of difference, take an average, although if the temperature varies by more than 0.5°C, you may have problems with chicks pipping their shells but not hatching.
SwitchBot
Wireless Temperature & Humidity
I use a Switchbot wireless sensor in my incubator and SwitchBot App on my phone.
I can view temperature and humidity and a graph with AVERAGES since the start of incubation.
I can adjust humidity to get the average right over the incubation period.


What temperature and humidity to hatch eggs?
To hatch eggs successfully in a forced-air incubator, use the following temperature and humidity:
Large Fowl
- Incubation period: 21 days.
- Temperature: 99.5°F/37.5°C.
- Humidity: 45-50%** for 18 days.
- Hatching: Day 19. Stop turning, increase humidity to 65-75%.
Bantams
- Incubation period: 19-21 days.
- Temperature: 99.5°F/37.5°C.
- Humidity: 35-45% for 17 days.
- Hatching: Day 18. Stop turning eggs, increase humidity to 60-70%.
Small bantams such as the Serama will have a 19-20 day incubation period.
Domestic Ducks
- Incubation period: 26-28 days.*
- Temperature: 99.5°F/37.5°C.
- Humidity: 50-60% for 24 days.
- Lockdown: Day 25. Stop turning, increase humidity to 75-85%.
Muscovy Ducks
- Incubation period: 33-37 days.*
- Temperature: 99.5°F/37.5°C.
- Humidity: 50-55% for 31 days.
- Lockdown: Day 31. Stop turning, increase humidity to 70-85%.
Domestic Geese
- Incubation period: 28-32 days.*
- Temperature: 99.5°F/37.5°C.
- Humidity: 50-60% for 25 days.
- Lockdown: Day 26. Stop turning, increase humidity to 75-85%.
Turkeys
- Incubation period: 27.5-28 days.*
- Temperature: 99.5°F/37.5°C.
- Humidity: 45-55% for 24 days.
- Lockdown: Day 25. Stop turning, increase humidity to 70-80%.
Helmeted Guinea Fowl
- Incubation period: 25-28 days.
- Temperature: 99.5°F/37.5°C.
- Humidity: 35-45% for 22 days.
- Lockdown: Day 23. Stop turning, increase humidity to 65-75%.
Japanese Quail
- Incubation period: 18 days.
- Temperature: 99.5°F/37.5°C.
- Humidity: 45-55% for 14 days.
- Lockdown: Day 15. Stop turning, increase humidity to 70-75%.
Notes
- Incubation period: In general, larger eggs have a longer incubation period, although eggs of the same species can also develop at different rates because of genetic differences between strains. Other factors are the temperature of incubation, the length and temperature of hatching egg storage and the season (there are more nutrients in spring eggs which promote faster growth).
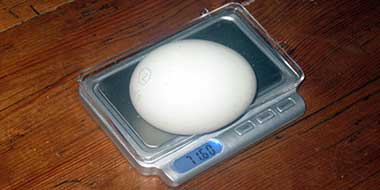
- Humidity: The average range expected for a species; however, there can be variation between breeds and even strains within a breed. Marans chicken eggs, for example, need about 10% lower humidity because the shells aren’t as porous as others. If you have difficulty with humidity, then check the optimum humidity by using the weight loss method.
- Hatching period (often called ‘lockdown’), approximately 3 days before the chicks emerge, the humidity must be increased by about 20-25%. It must not exceed 90%, or the chicks will not be able to dry off and fluff up, and there will be excessive condensation in the incubator.
Ventilation
Embryos need to absorb oxygen and expel carbon dioxide through the shell; allowing fresh air to come in through the vents during incubation is crucial.
As the embryo develops, more and more fresh air is required, and when chicks hatch, they need the most oxygen.
Some incubators have fixed vents; however, you may need to open vents further during the lockdown period if there is an adjustable vent.
Opening vents to increase fresh air will make it more challenging to raise the humidity, so you may need to add additional water to the incubator (in the base or a small tray) to help keep the humidity high during the hatch.
If there is a shortage of oxygen, it can affect chicks’ growth, or worse still, they can die in the shell before hatching.
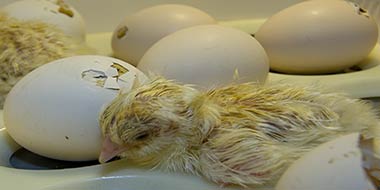
Turning eggs during incubation
Eggs need to be turned regularly through 180 degrees during the incubation period at least three times per day to keep the embryo in the centre of the egg, preventing it from sticking to the shell.
Ideally, start turning on day three until you reach the hatching period. Most automatic incubators will turn from the start of incubation. This doesn’t make a big difference to the hatch rate of domestic poultry; it becomes more important for wildfowl eggs which are harder to hatch.
If you manually turn your eggs, place a cross on one side of your eggs using a soft pencil.
If your incubator turns your eggs automatically, check it’s turning them correctly and whether you need to stop the turning mechanism when you go into the hatching period three days before they hatch. Turning is stopped at this time so the chicks can position themselves ready for the hatch.
Cleaning your incubator
Cleanliness is essential. Hatching eggs causes a lot of mess, and bacteria multiply very quickly at incubation temperatures.
After the hatch, clean your incubator with a damp cloth using warm, soapy water. Always unplug it from the mains before cleaning, and be careful not to get any of the incubator electronics wet.

Be careful of household cleaning products which can damage your incubator. After cleaning, disinfect it by wiping it over with an incubator disinfectant.
Don't count your chicks...
With small, budget incubators, I would say a 50 or 60% hatch rate is reasonably standard for beginners. You will probably be able to fine-tune the settings in subsequent hatches as you learn the quirks of your particular incubator. Still, some budget models don’t have an even temperature distribution or stable enough temperatures and will not cope well with temperature fluctuations in the room.

I evaluated several different incubators in my Guide to Choosing an Incubator (coming Summer 2021). As a general rule-of-thumb, you get what you pay for, so if you still can’t get good enough results, you have to weigh up the incubator’s cost against the number of chicks you wish to hatch and raise.
It costs as much to raise one chick under a heat lamp as it does several!
Good luck, and please leave me a comment to share any peculiarities you’ve found with your incubator.