The ‘cheap’ Chicken or Duck house cost me about £25 to build, yet is the most sturdy, well-insulated house I have! Normally my advice to people looking to buy a chicken house is to spend a little more on the house as very cheap houses tend to need replacing after a few years but this one isn’t going to rot in a hurry!

This chicken or duck house, if you pardon the pun, goes against the grain. You must be thinking by now that this all seems too good to be true, but there is one key ingredient to this house that keeps the cost down, and that is, the frame underneath it which is a surplus wooden packing crate…
I built two of these houses, one for ducks, one for chickens and this is how I did it for a total material cost of under £50 for the two.
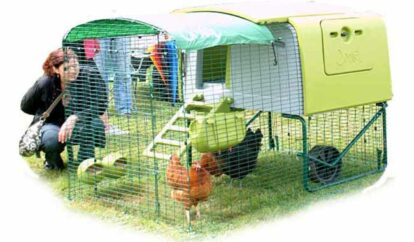
[note style=”info” show_icon=”true”]If you are looking to buy rather than build, see my article on Cheap Chicken Coops which has some suggestions for sub £200 Chicken Houses.[/note]
Step 1 – The wooden packing crate.
To get one of these, you will need to drive around a few industrial estates where there are companies likely to be receiving international shipments and when you spot some crates, be prepared to knock on the door and politely ask whether you can have an old one!

Transportation is your next problem but if you take a claw hammer with you and (ideally) a crow bar, you will find you can break the crate down into 4 sides, a lid and a floor. These will fit in the back of an estate car with the seats down or onto a roof rack of a vehicle. Even easier than this is if you have access to a trailer, you can easily transport the crate whole which saves some time rebuilding it at home.
[note style=”warn” show_icon=”true”]Caution: If you are taking the crate apart, always make sure to bend the nails or take them out completely so that you do not end up stepping on one![/note]
Once you have your crate(s), the rest is really quite easy.
Step 2 – Other materials
- Tongue and Groove – you will need some pressure treated tongue and groove. This can be thin – 8mm, cheap stuff because you have support behind it. It is just to cover the crate and make it look good. It also provides some insulation around the outside which keeps the house warmer in winter and cooler in the summer.
- Nails – You will need some flat head nails, long enough to go through your T&G and into the crate, but not so long that they stick out into the house. I used 20mm nails.
- Roofing Material – I used Onduline as you can see on mine. It isn’t expensive and is light weight. Leave an overlap on the ends.
- Roof fixing nails – I bought a packet of special Onduline fixing nails with plastic washers and caps. Normal nail heads would just rip through.
- Various bits of wood – The pop hole on my chicken house was ply, on the duck house I used the cut out from the crate and added T&G to the outside of it. A perch was added across the inside of the chicken house.
- For the duck house – Various hinges and a bolt. Buy galvanised as these will last for a very long time.
Step 3 – The build

Cut the hole out for the door / pop hole (make a wide door for a duck house, as shown in the photo left) but ensure you leave an edge / lip at the bottom. This is to keep your bedding material inside the house, stopping it being trampled outside.
The easiest way I found to cut out the hole was to drill 4 large holes for the corners and use a jigsaw to cut around. A small pointed hand saw that is used to cut holes in ceilings would also work but take a little longer. Rough plain or sand the edges so there are no sharp corners or splinters. You can line this doorway if it looks too rough when the tongue and groove has been fixed.
A small ventilation window should also be cut in the side at high level on both sides and covered with wire. This allows ventilation to remove ammonia from droppings but doesn’t make it drafty for the birds.

The next step is to put the tongue and groove wood onto the sides. Move the house close to its final position first though because it will be really heavy once completed. I have to roll mine around the place when I want to move them.
Start at the bottom and work upwards, interlocking the boards and nailing as you go. When you get to the top, if there is a little overlap, don’t worry, this can be used to ‘drop’ the lid / roof in to hold it in place.
I made one side flush so I could slide the lid into position (it’s quite heavy). Once the tongue and groove is finished, you can nail the Onduline or similar onto the roof. The roof should be able to lift off or be hinged to allow cleaning.
The door / pop hole should be made and fitted, don’t forget to make sure this is securely held shut at night to stop foxes.
Step 4 – A Coat of Paint.
 The final step to your chicken / duck house is of course to give it a good coat of preservative or paint. I decided to go for paint as I like having colourful houses dotted around the field where I keep my chickens.
Paint can be as colourful as you like, providing you use outdoor paint suitable for sheds and fences that is animal friendly.
Make sure the house has a good week or more to dry and air so there is no smell of paint when your birds go in. If the paint doesn’t say it’s animal friendly on the back then look for the customer service number and give them a call to make sure.
Most outdoor paints are fine these days once they have dried and the area has aired.
Final Comments
The biggest disadvantage I have found with these houses is that should red mite get in between the crate and tongue and groove, they are impossible to get out. It is for this reason that I have found them to be very suitable as duck houses.
When I added up my bill, I found this house cost me around £25 to build. This was partly because the wood came as ‘weathered’ offcuts from a wood yard that made garden sheds and were cheaper than normal.
I guess it would cost you a few pound more if the wood was top grade. If you can’t get pressure treated for a sensible price then just make sure you paint the house well and keep it painted every year to stop the wet weather from rotting the wood.
I found this house to be very easy to build because you have the frame work in place and cutting the wood to length can be done once it is nailed in place.